
Arduino: Phixter Visits, blinking a led each time your website receives a visit
PhixterVisits is a way to convert an user visit on your web site into a blinking led on your desktop.
I have received for my birthday present one of the most awesome presents a geek can received: an Arduino Workshop Kit.
The first experiment I did was, of course, a Hello World, and after that I build something I was feeling like doing for long time: blink a led when someone visits my website.
This is very useless thing, I know and I don’t care, I just think that when something happens on the web and it become in something real on my table this is kind of magic.
On the beginning was a very simple experiment and withing an afternoon I build an small Sinatra project that received requests with a numerical parameter, the Sinatra webapp sent a signal to an script on my computer through a socket, and my computer finally sent this numerical value to the Arduino that knew with led to blink on depending the value.
This was awesome, I could to hidden an ‘img’ html element on my website asking for an image that in fact was a request to the Sinatra webapp and then the rest worked by it self.
Finally I wanted to play a competition with my girlfriend, she has a very most popular website than mine is, and then I was thinking to do all this stuff much easier to configure so this is because PhixterVisits born.
PhixterVisits is composed for three layers:
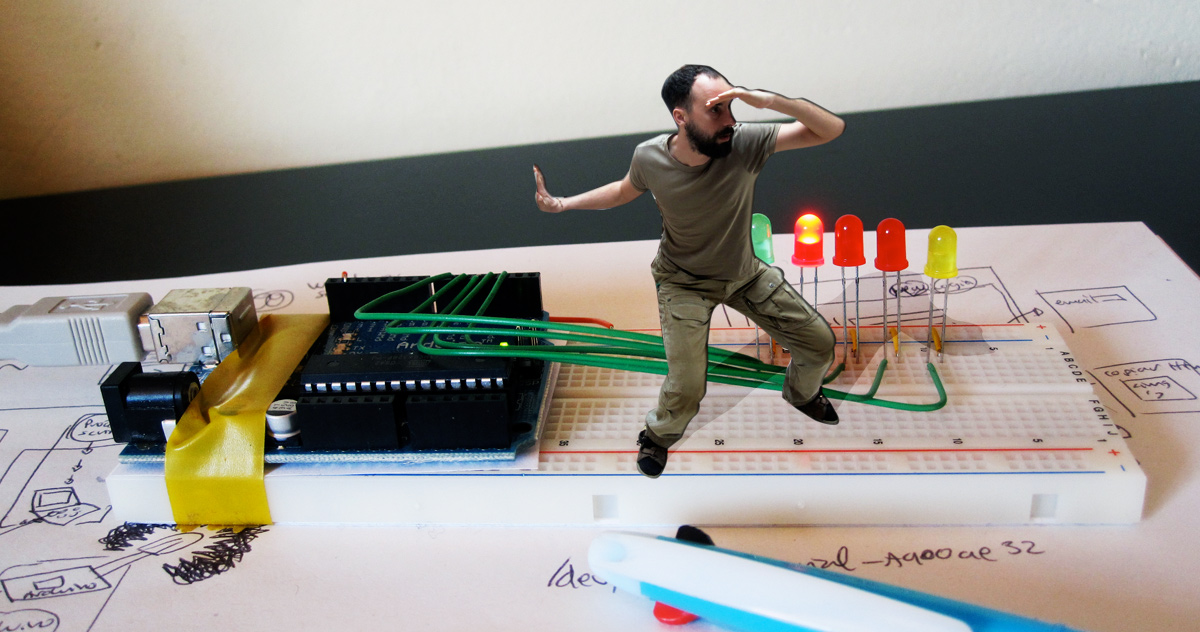
Arduino Sketch and Circuit
This is the most simple layer. It is a simple Arduino sketch that opens a Serial connection with your computer waiting for numerical values from 1 to 11, on depending the value received the Arduino will send a signal to one of its digital output connections.
The circuit is also very simple as you can see on the ‘How to Install It’ section.
Local Server
The local server is also very simple but I’ve complicated it becoming what was a simple console script on a wxRuby desktop application so you can configure it and test it visually.
Web Service
Is a Rails application where you can register your self and configure what I call ‘Phixters’. The Phixters are composed by an ‘URL:Port’ address what is your local computer public ip and the port where the Local Server is listening. You configure a value for each Phixter. And finally you can copy a very small piece of html code that you have to paste on whatever place of your website you want.
This piece of html code is the one that hides the Web Service request on an image so when your user visitors are watching an image a signal was sent to the Web Service.
How To Install It
I suppose you have a few experience with Arduino, at less you have obtained to operate the ‘Hello World’ with Arduino.
The Arduino Layer
Download the Arduino Sketch and upload it to your Arduino controller.
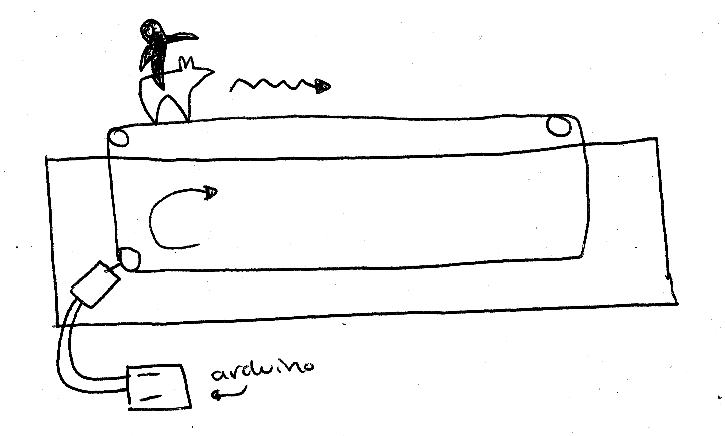
Build the circuit as show in this draw.
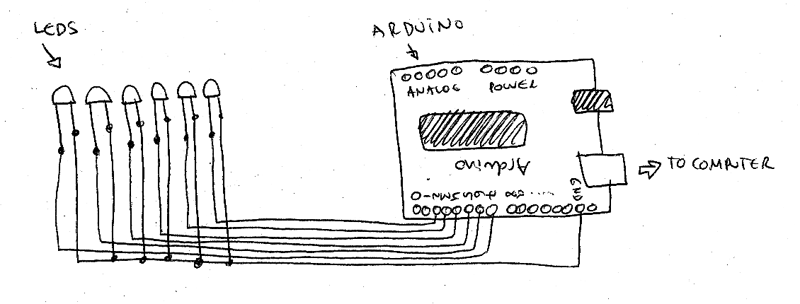
On this draw and on all my tests there are only 6 leds but you can fill all the digital outputs with leds and they suppose to work. Put atention that the digital outputs 0 and 1 are not being used, that is because on the circuit there is printed ‘RX’ and ‘TX’ on this out puts and I didn’t want any serial communication interference (I really don’t know if this interference was going to happened).
For test it you can open the ‘Serial Monitor’ of your Arduino app and send numerical values like ‘1′ or ‘2′ or ‘6′, the corresponding leds should blink for while.
Local Server
Download the ‘Local Server’ wxRuby desktop application.
You must to have Ruby installed on your computer and also the ‘wxruby’ gem:
$ sudo gem install wxruby
Go to the directory you have uncompressed the ‘Phixter Visits Local Server’ app and run on console:
$ ruby wx_tcp_server.rb
Yo should see something like on this picture:
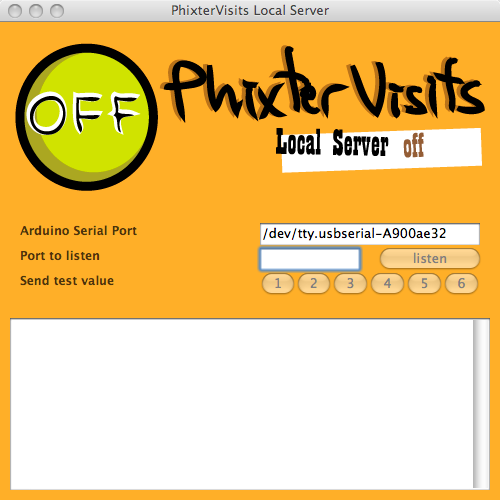
You have to know the name of the USB port of your Arduino and replace the text box named ‘Arduino Serial Port’ with yours one.
Select a port where you want the Local Server listens, for example ‘20000′.
Push ‘listen’.
You should see something like this bellow:
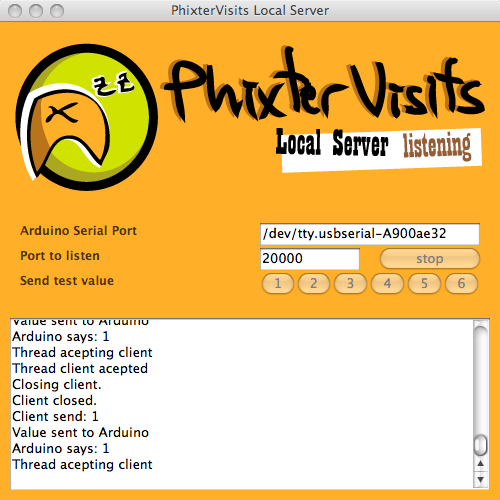
If you want to test it you can push ’stop’ and play with the ‘Send test value’ buttons. If you click on these buttons a corresponding led should blink.
Press ‘listen’ again and let the Local Server listening.
The Web Service
Go to PhixterVisits, register your self and create a Phixter for your web site like this:
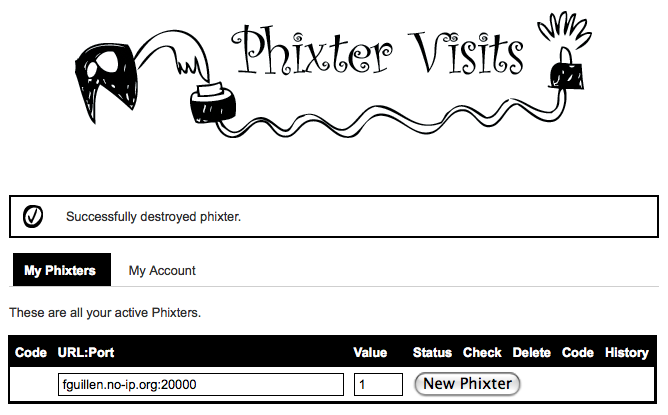
On URL:Port you have to put the public IP of your computer (or whatever computer your Local Server is listing), the Port is the port you have said to Local Server to listen.
Look that I’m using the ‘no-ip.com’ service so I don’t have to take care of my non-static public IP.
You can create any number of Phixters you want, one of them could be for a different website, just take care you are using the correct ‘code’ of each one.
Very important also is that I’m not going to talk about how to configure the NAT of my home router. This is diferent on each router and is the same theory of ‘opening the ports’ for your emule. Although I’m not talking of this step, this step is very important and the Web Service won’t can talk with your Local Server if this is not well configured.
You can check the communication from your Phixter on the Web Server to your Local Server on your desktop computer by pushing the button ‘check’ as you see bellow:
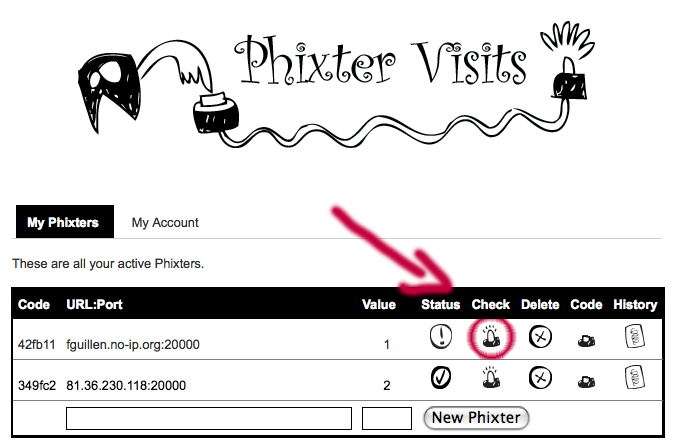
This will send a signal to the URL:Port configured on this Phixter sending the value indicated, if everything is connected and working a led will blink on your Arduino circuit and a Ok message will appear on the Web Server page.
The HTML code on your Web Site
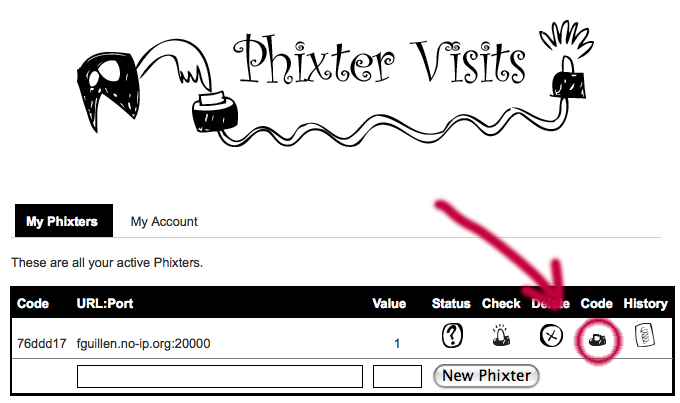
Still on the Phixter Visits Web Site, go to the ‘code’ of your Phixter:
Copy the code on the textarea:
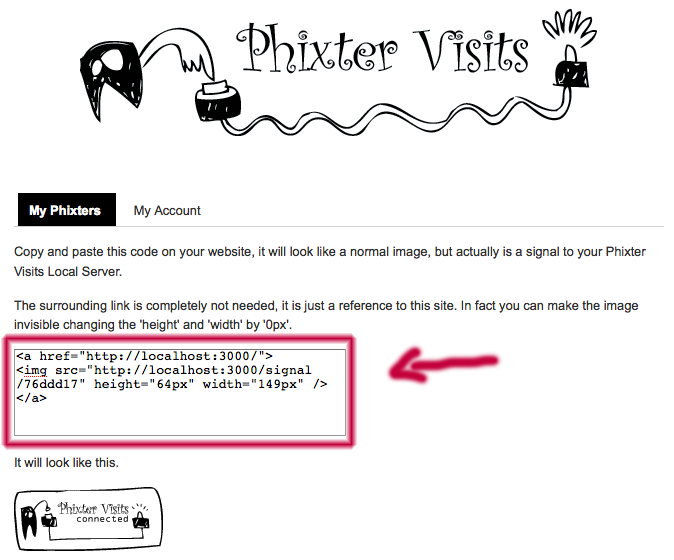
And paste it on some place on your web site, be intelligent here and don’t put it on a place that an image is not going to be loaded.
From now on each time your website is loaded this image will want to be loaded and a request will arrive to the Web Service which will send a signal to your Local Server which will send a signal to your Arduino which will make the corresponding led to blink.
What is next
The game now is to connect to the Arduino not leds but DC motors so when a signal arrive the motor will work for a while and then stop until the next signal arrive. The motor will move some kind of figure like a horse or something then the race can start.
Also will be great not to depend on a computer to communicate with the Web Service, using a ethernet interface directly connected to Arduino could be great.
The Code
All the code of this project, even the the Phixter Visits Web Service is available on the Phixter Visits Github Repository.
Responsability
Play with this code and instructions on your own risk, I’m a very beginner on all of this Arduino stuff and some problems could happen to your loved kit.
License
You can do whatever you want with the code, attributions will be grateful.

Phixter Visits by Fernando Guillen is licensed under a Creative Commons Attribution 3.0 Unported License.
